Removing X10 Body Panels
Last Modified: 31 December 2014
R
EMOVING BODY PANELS
For the following, 'tabs' refers to the plastic tabs that have spring clips over the end, and which snap into rectangular holes in an opposing panel.

WARNING: these can be very tight and difficult to pull out, especially where the spring clip has gone very rusty, causing it to jam in the rectangular hole. I have broken a couple of tabs off because of this, or if I'm luckier the spring has pulled off the end. If the spring was too rusty or bent to reuse I just threw it in the bin. There are more missing tabs too, so somone else has obviously been here before me!
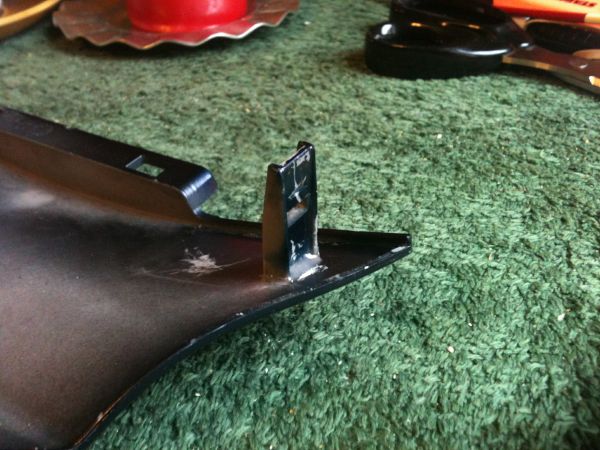
Here's a tab I broke off and glued back on with Araldite:
IMPORTANT: generously grease all the springs before reassembly, to weatherproof them and make them easier to remove for the next time.

REQUIRED TOOLS
A set of Torx keys and a set of Torx drivers both having T20, T25, T30, T40 sizes. A cordless power driver with a set of Torx, Allen and posidriv bits will also save a lot of time, if available. At least one large flat bladed screwdriver as an aid for levering tabs apart. If a rear carrier for a topbox is involved, medium/large posidriv screwdriver, No. 5 Allen key, 10mm ring spanner. WD40 (or equivalent) to lubricate stubborn tabs.
Let's say we wanted to get access to the air filter (lefthand side). This requires removing the rear so-called semi half fairing panel.
The entire back end must be removed, including the rear 'handles'. I have the rear carrier version, so first I need to remove the topbox base cover (4 posidriv screws). Tilt the cover up at the back, and pull it out from two small slots at the front.

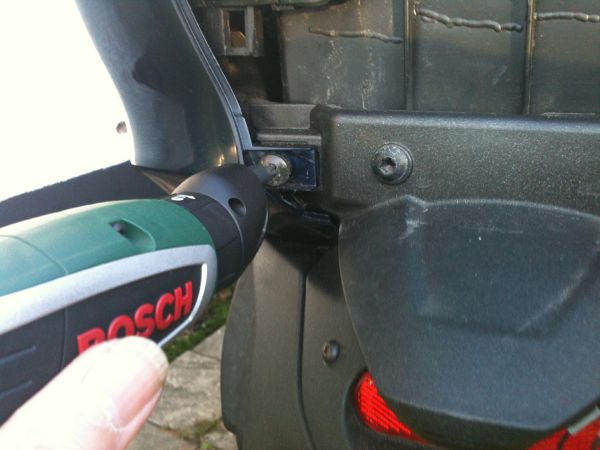
Remove the 11 T20 'hidden' torx screws (8, 4 on each side, if you have got the non-rear carrier handles only). This is extremely fiddly and time consuming because you cannot get a torx driver onto them, so must use a torx key (as shown), although my power driver has a right-angle attachment which just about fits in for most screws.
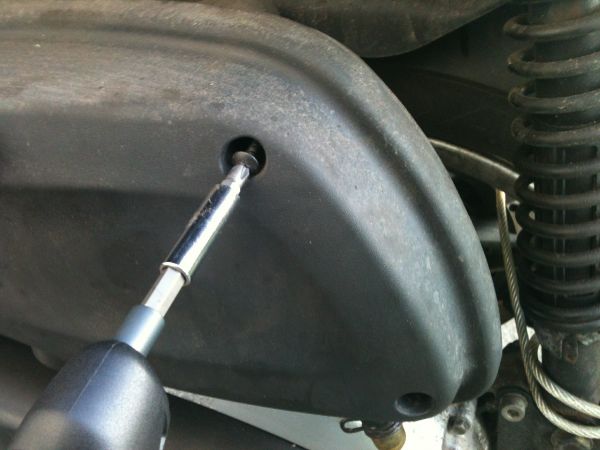
The 3 screws around the back of the carrier section can be accessed by a long bladed driver however.

Topbox base is secured with 4 M6 allen screws. The longer rear ones protrude all the way through and have lock nuts underneath. While holding the heads with a No. 5 allen key, remove the nuts (10mm spanner):

By the way, ice cream tubs or similar are extremely handy for keeping and grouping fasteners etc. All the rear carrier fasteners in one box, side panel ones in another, and so on...

Remove the 4 allen screws, note the rear ones are also threaded in the frame so still need unscrewing ~ don't forget to also rescue the rectangular plates under each screw head:

After removing the base, rescue these 4, now loose, stepped spacers:

Pull up the top cover from the rear and withdraw backwards ~ note also secured by 4 tabs...

... to reveal the internal frame...

... which is secured to the bike's frame by 4 T40 torx screws. The handles only version will be identical. Remove these 4 screws and the whole thing will virtually fall off. (For which reason remove the rear ones first, otherwise it will want to tip up and fall off the back when you come to undo them with the front ones removed.)

Remove the battery compartment cover. Note that the two screws for this have different threads to all the other T25 screws, so do not get them mixed up.
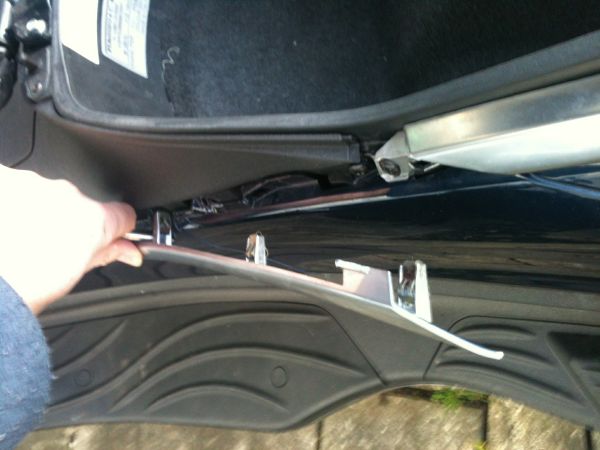
Remove 4 T25 screws securing the tail top cover. Note the front two also go through the ends of the rear silver trim strips...

Remove the T30 battery clamp screw, and the clamp...

The cover should pull off backwards. Note however that it is also secured by a tab on each side, so some careful leverage may be required...

Remove the rear Piaggio nameplate...

... which releases the painted panel below, which is 'only' held on with a tab on each side and two small hooks at the bottom corners...

NOTE that most of the tabs' spring clips around this back end area were thick with rust, due to spray thrown up by the rear tyre. The two clips on this panel were so resistant to removal that I broke off the lefthand tab, the one that I Araldited back together later...
Carefully prise off the middle silver trim strip... it is only held on by tabs...
... to get access to the front screw holding the rear trim strip...

... then prise off the rear trim strip...

Remove all visible screws from the top edge of the middle panel...

By (carefully) levering out the tabs on the lower edge, you can then pull out the back end of the middle panel far enough to be able to...

... get access to this screw...

There is a hidden screw here, at back end of the footboard...

Larger T30 size bolt here ~ this is why we have to take off all the tail end panels ~ this plastic tongue also has a hook on the end engaging with the mudguard moulding...
Remove the screws from top edge of the semi half fairing panel...

... and finally this screw above tail light...

Pull out the top of the semi half fairing panel and unplug the lights...

Lever out two tabs at the bottom edge...

... and the whole thing will come off in your mitt...

Note that this 'seam' is fake...

AIR FILTER
The air filter housing is now more get-at-able... mine has 3 screws with plastic knobs for turning by hand, the front one in particular can only be turned this way, because it's behind the footboard stuff.

Otherwise I can get a posidrive screwdriver on the others...
A little bit of crafty wrestling is required to get the cover out, because the front screw can't be pulled out all the way because of the footboard, so it has to stay in situ with the cover.

Air filter element simply pulls out ~ according to service manual, at the relevant service interval it should be blown through in reverse direction with compressed air, then washed in hot water and 'soap' (detergent?), then left to dry. Then soaked with a 50/50% mix of petrol and engine oil, then the excess squeezed out, before refitting. Alternatively I bought a spray can of Castrol foam filter oil.
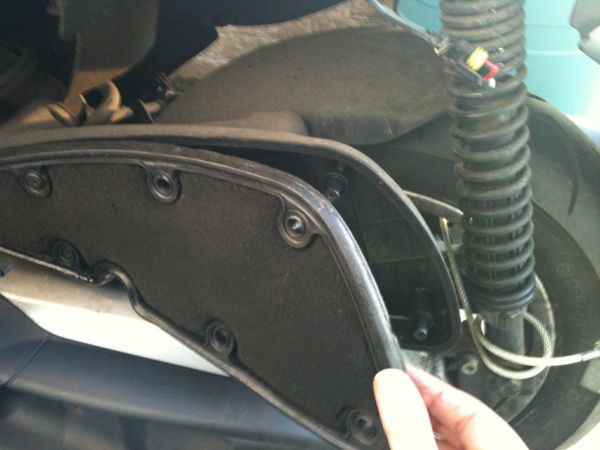
Below, location of the air filter housing fixing bolts, which also attach the hugger on its lefthand side ~ the ends actually screw into captive nuts on the hugger. The OEM bolts are M6 but have 8mm heads, (!) and deeply recessed, so a complete pain in the ass to reach if you haven't got an 8mm socket; fortunately my angled 8mm ring spanner could just reach. The other bolt was entirely missing (so therefore my air filter housing was only held on with one bolt!).
I replaced both with similar length M6 Allen screws, which are much easier to get at with an Allen key or hex driver bit!

More to follow...