X10 Rear Carrier
Last Modified: 27 December 2014
F
OR THE FOLLOWING 'tabs' refers to the plastic tabs that have spring clips over the end, and which snap into rectangular holes in an opposing panel.
WARNING: these can be very tight and difficult to pull out, especially where the spring clip has gone very rusty, causing it to jam in the rectangular hole. I have broken a couple of tabs off because of this, or if I'm luckier the spring has pulled off the end. If the spring was too rusty or bent to reuse I just threw it in the bin. There are more missing tabs too, so somone else has obviously been here before me!
Remove the two grab handles ~ underneath each are four (I think) 'hidden' T20 torx screws ~ usually will require a right-angled torx key because of restricted access:

Once the screws are removed, the top half of the handle can be carefully prised open and pulled off ~ note there are also two tabs that have to freed.
Beneath, remove the two T30 torx bolts ~ do the same for both sides:

Install the lower half of the rear carrier, using the same T30 bolts.

Clip on the rear carrier top half ~ same as standard handles I believe but with the extra rear carrier section with three extra T20 screws.

Insert the stepped spacers, these prevent the plastic being crushed by the topbox base bolts.

Position the topbox base...

... and insert the four M6 Allen bolts, WITH the rectangular plates that grip the base plastic ~ the shortest bolts go to the front:

The longer rear bolts go right through, and have lock nuts underneath (10mm spanner). Tighten bolt first then hold it with Allen key and tighten nut.

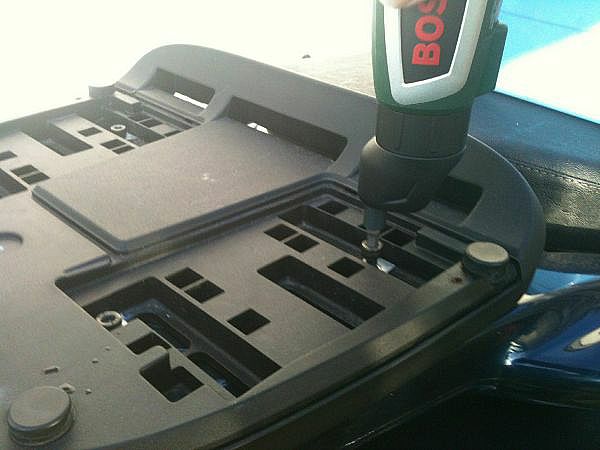
Insert and tighten the eleven 'hidden' T20 screws under the edge of the lower rear carrier and side handles:

Install the topbox base top cover ~ fixed with four posidrive screws.

Job done!
