Rega RB250 Tonearm Rewire – aka fun with Litz (not)...
Last Modified: 21 Jul 2012
Compiled from Audio Talk forum topic
Don't ask me to do this again in a hurry! The Litz wire is a barsteward to solder. So tiny!
I started with the instructions on this thread ~ 3rd post down or something like that:
http://www.pinkfishmedia.net/forum/showthread.php?t=54126
However I had a brilliant idea, or I thought I did. I thought if I solder the Litz wires to the ends of the originals ...

... then it should be possible to pull them through to the front? Yes you can, if only one at a time ~ voila! (but very carefully!)
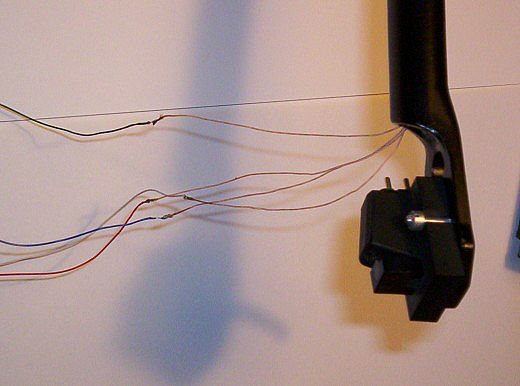
Note I didn't take the rubber grommet out of the centre pillar and they still went through. So I left it at that.
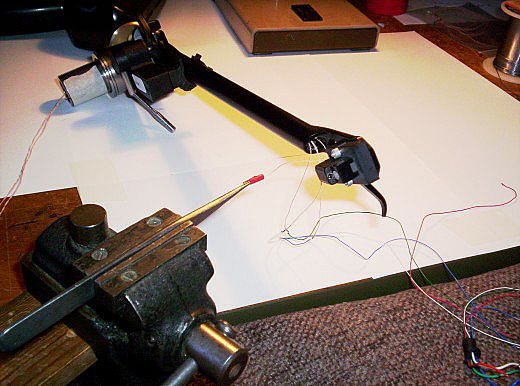
The workspace ~ white background, desk lamp and magnifying glass essential!

The "tweezers vice" for holding the connectors while changing over wires:
That part all done. Aged coloured insulation tape of unknown vintage to identify which is which.
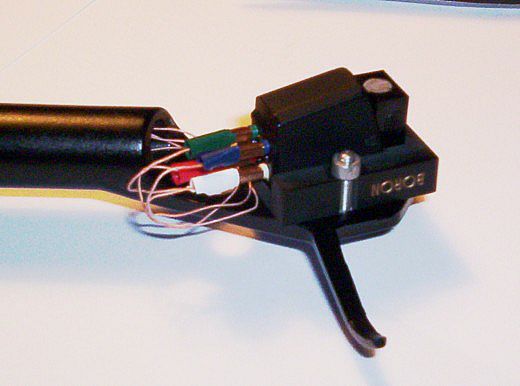
The bottom end:

Arm back on ~ additionally, the solid oak armboard somebody made for me (thanks Ant) is now held down with a couple of stainless Allen screws so it doesn't entirely depend on the pillar nut to stop it moving about of it's own accord:

Idea!

Wasn't sure how to do this bit TBH, then was suddenly inspired when presented with the actual reality. Bit of stripboard on a bracket to the rescue: (Note copper tape under the nut for the earth wires.)


Then with the interconnects soldered on, should be finished.

Note the interconnect leads were made from 'Evolution XPC OFC Professional instrument cable' available from Rapid Electronics in 20 metre lengths, order code 02-0610, I use this stuff for all my interconnects now, with gold plated phono plugsand sockets, or Maplin JU06 etc. as it really frees up the sound of everything wherever it's used.
The new digi-scales work!
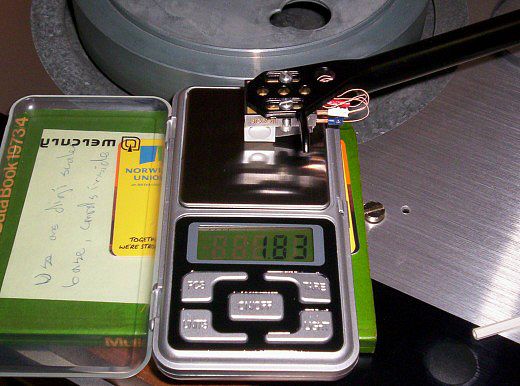
For the Nagoaka MP10 cartridge the stylus weight is critical, must not exceed 1.8g else the treble goes AWOL. Initially it was still bass heavy and "summat not quite right" at the top end. Experiments with little bits of blu-tack stuck to the headshell or alternatively the counterweight indicated more VTF made it duller. However I was then advised to do this a different way, as the above illustrated was simply not accurate enough, i.e. get a small piece of card folded into an upside down 'U' to go on top of the digi-scales platform, after finding out what's the actual height where the stylus would normally sit on a record. The end result is slightly under 1.8g and it sounds absolutely superb IMHO.
Similarly, the anti-skate has to be right as well, or the same sort of effect occurs re left versus right channels. A forum topic I subsequently read suggested that the Rega's magnetic anti-skate scaling (as equivalent VTF) is at best "approximate", and suggests in reality using about one third to half the value as marked on the scale. This I had already found out for myself.